The SocketLabs WordPress Plugin allows you to easily route email generated by WordPress through SocketLabs rather than the default email delivery feature that WordPress provides.
Why Use The Plugin
Use the SocketLabs WordPress Plugin if:
- Your mail from WordPress is failing to be delivered and you need an easy way to get your email to the inbox.
- You’re looking for better inbox placement provided by an optimized email network.
- You would like to get more insight into the performance of your email from the detailed reports in the SocketLabs Control Panel.
- Your WordPress site is exceeding the number of emails allowed by your ISP.
By using this plugin, you can get your mail flowing through WordPress while benefiting from our powerful delivery platform that’s built to get your emails to the inbox.
In this article, we’ll show you how to easily configure the SocketLabs WordPress plugin.
Prerequisites:
Prior to configuring your WordPress plugin, please ensure that you have the following:
1. SocketLabs Account: You’ll need a SocketLabs account to use this plugin. If you don’t have one, then click here to create a FREE account.
2. SocketLabs WordPress Plugin Installed: You’ll also need to have our plugin installed on your WordPress site. If you don’t have the plugin installed, then here’s how to get it:
Note: Alternatively, you can also get our plugin on GitHub by clicking here to download the SocketLabs WordPress Plugin.
Step 1: When logged-in, click on the Plugins link in the left navigation panel of your dashboard.
Step 2: Click on the Add New plugin button that’s located in the upper-right hand corner of the screen.
Step 3: You should be looking at the Add Plugins page. Enter “SocketLabs” in the Search plugins field and hit enter.
Step 4: You should see a SocketLabs Plugin in the search results area. Click the Install Button. After the plugin installs, click Activate.
Step 5: Go to the left-hand side of your screen in the Dashboard Navigation Panel and locate the SocketLabs Plugin, which is nested under the Plugins link. Click on “SocketLabs” to start configuring your plugin.
How to Get Your API Key & Server ID Number to Configure the Plugin
Configuring your SocketLabs plugin is fast and easy. Follow the steps below to get started:
Enter Your Server ID and Your Injection API Key
First, you’ll need to access your Control Panel to find your Server ID and API key.
Step 1: Click here to login to SocketLabs.
Step 2: You should now be looking at your Server Dashboard. If you have multiple servers, then locate the Server that you want to connect to the Plugin. Your Server ID is located to the right of View button.
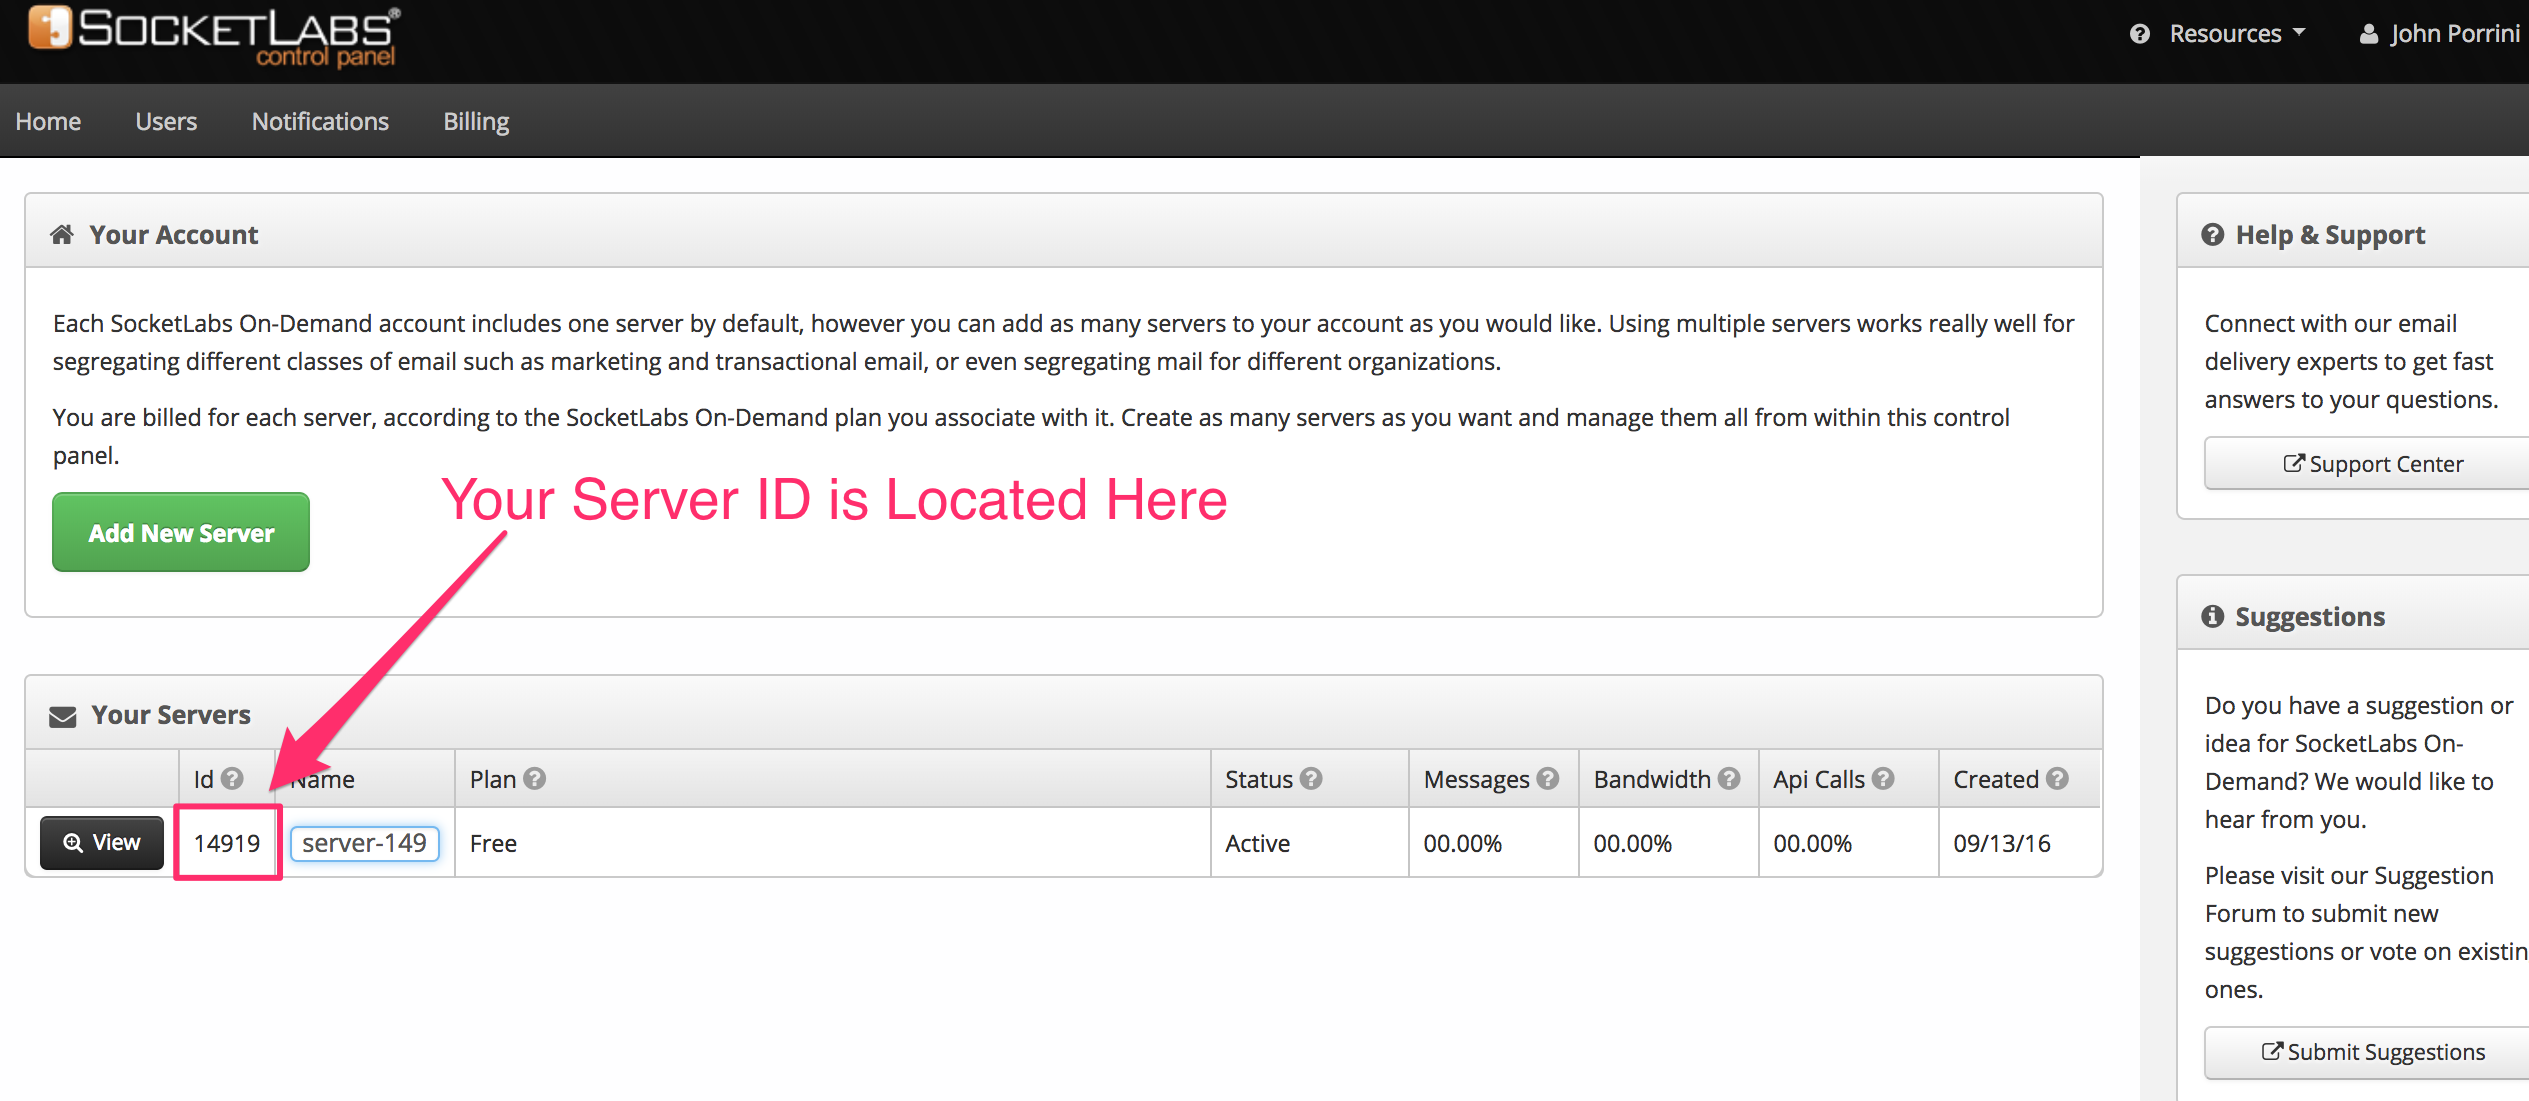
Make note of your Server ID because this is the first bit of information that you will need to enter in your Plugin
Step 3: Next, you’ll need to get your Injection API Key. To locate your Injection API Key, click on the View Button.
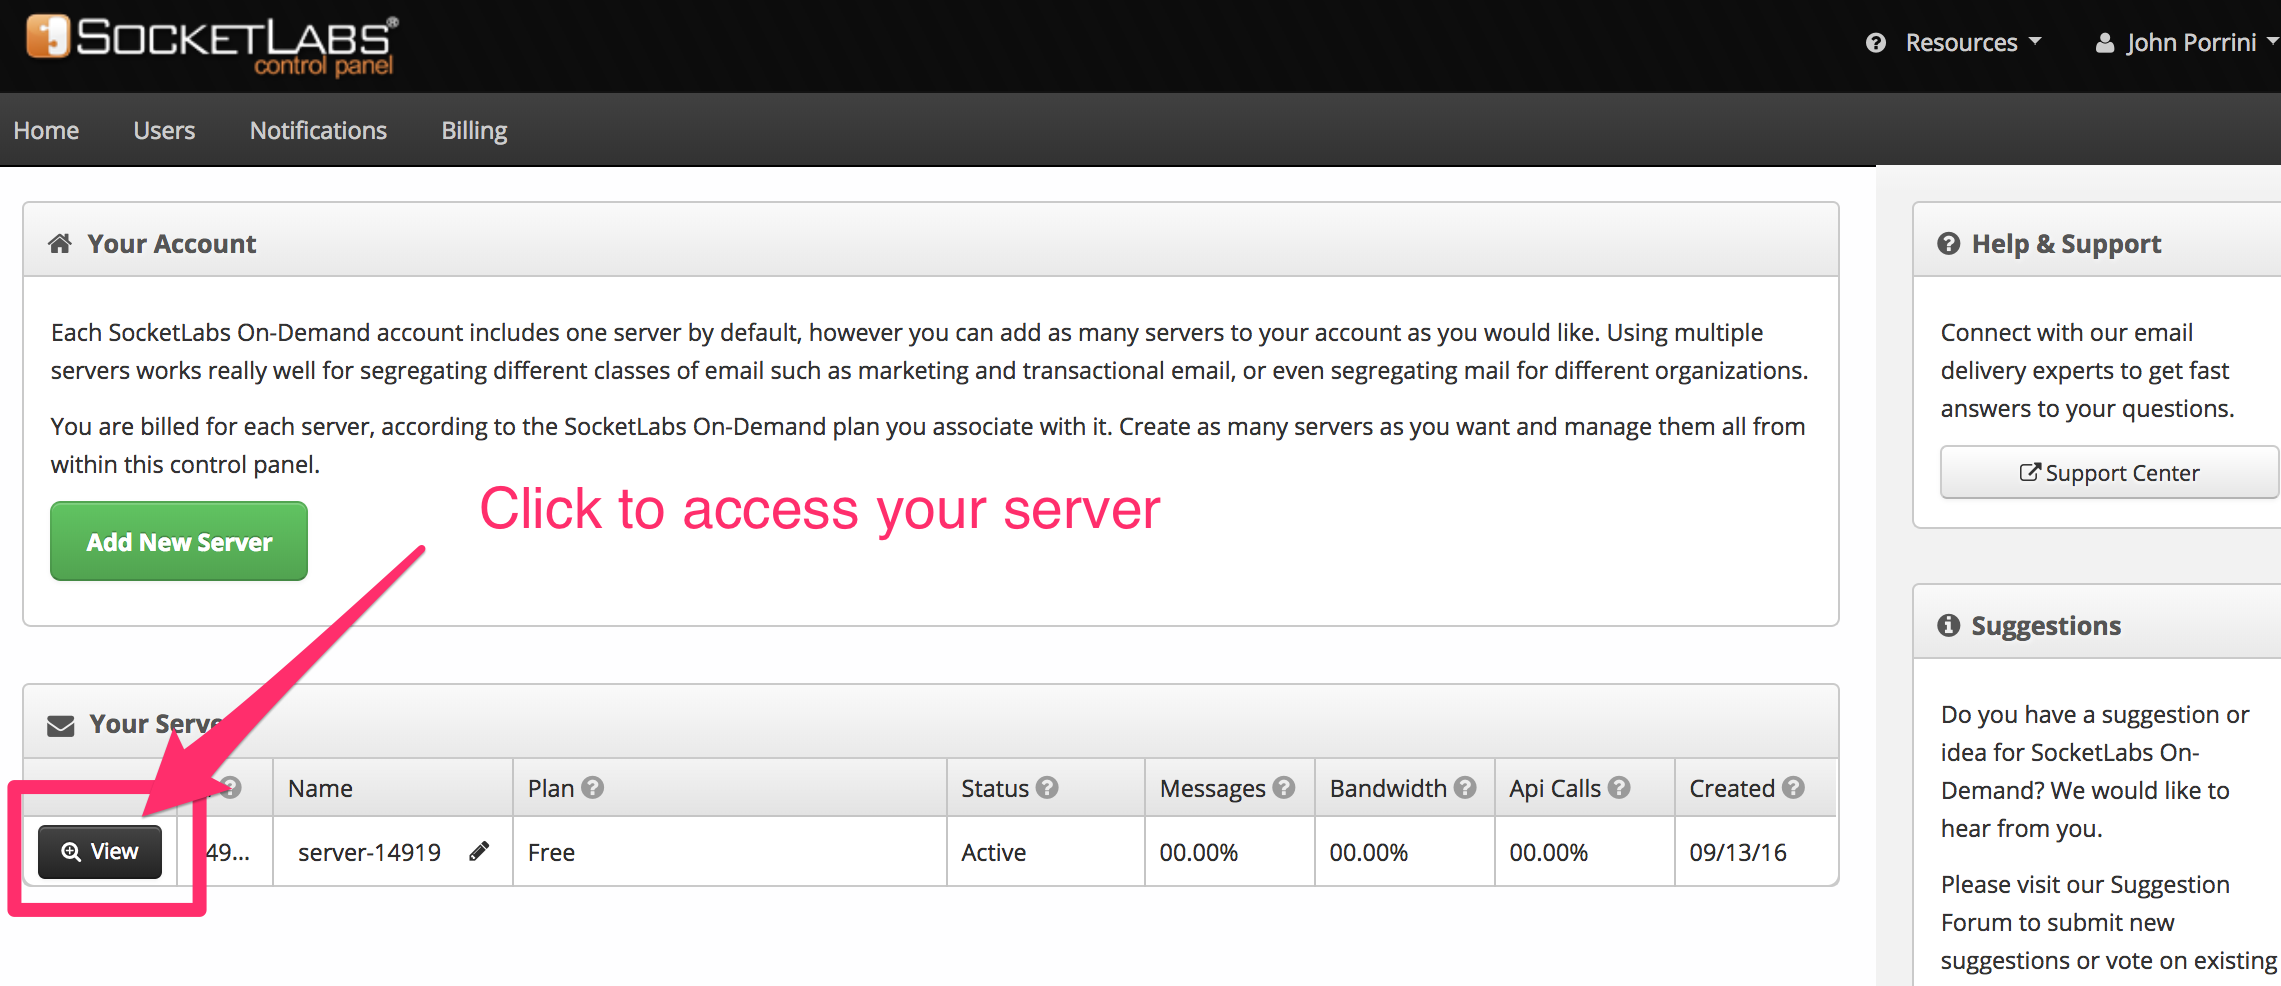
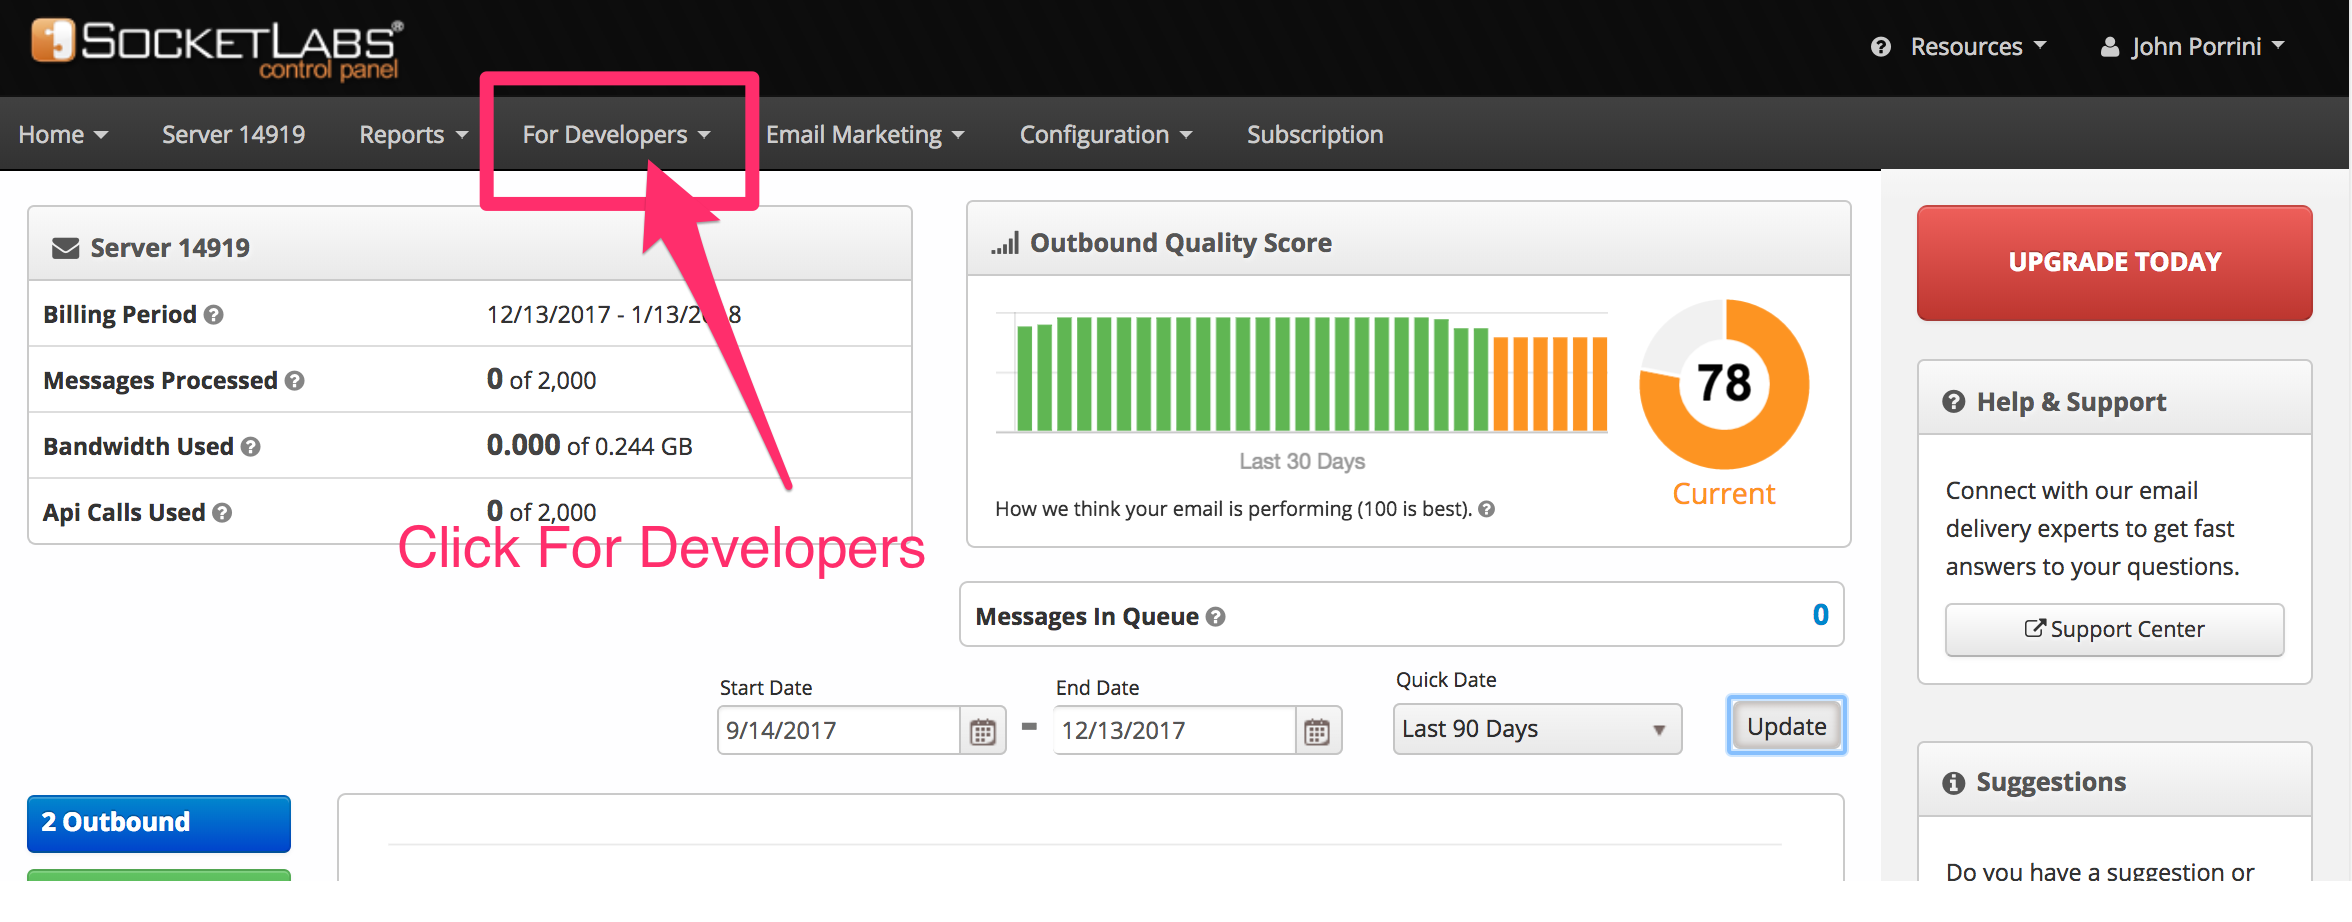
Step 4: In the navigation area, click on the For Developers link.
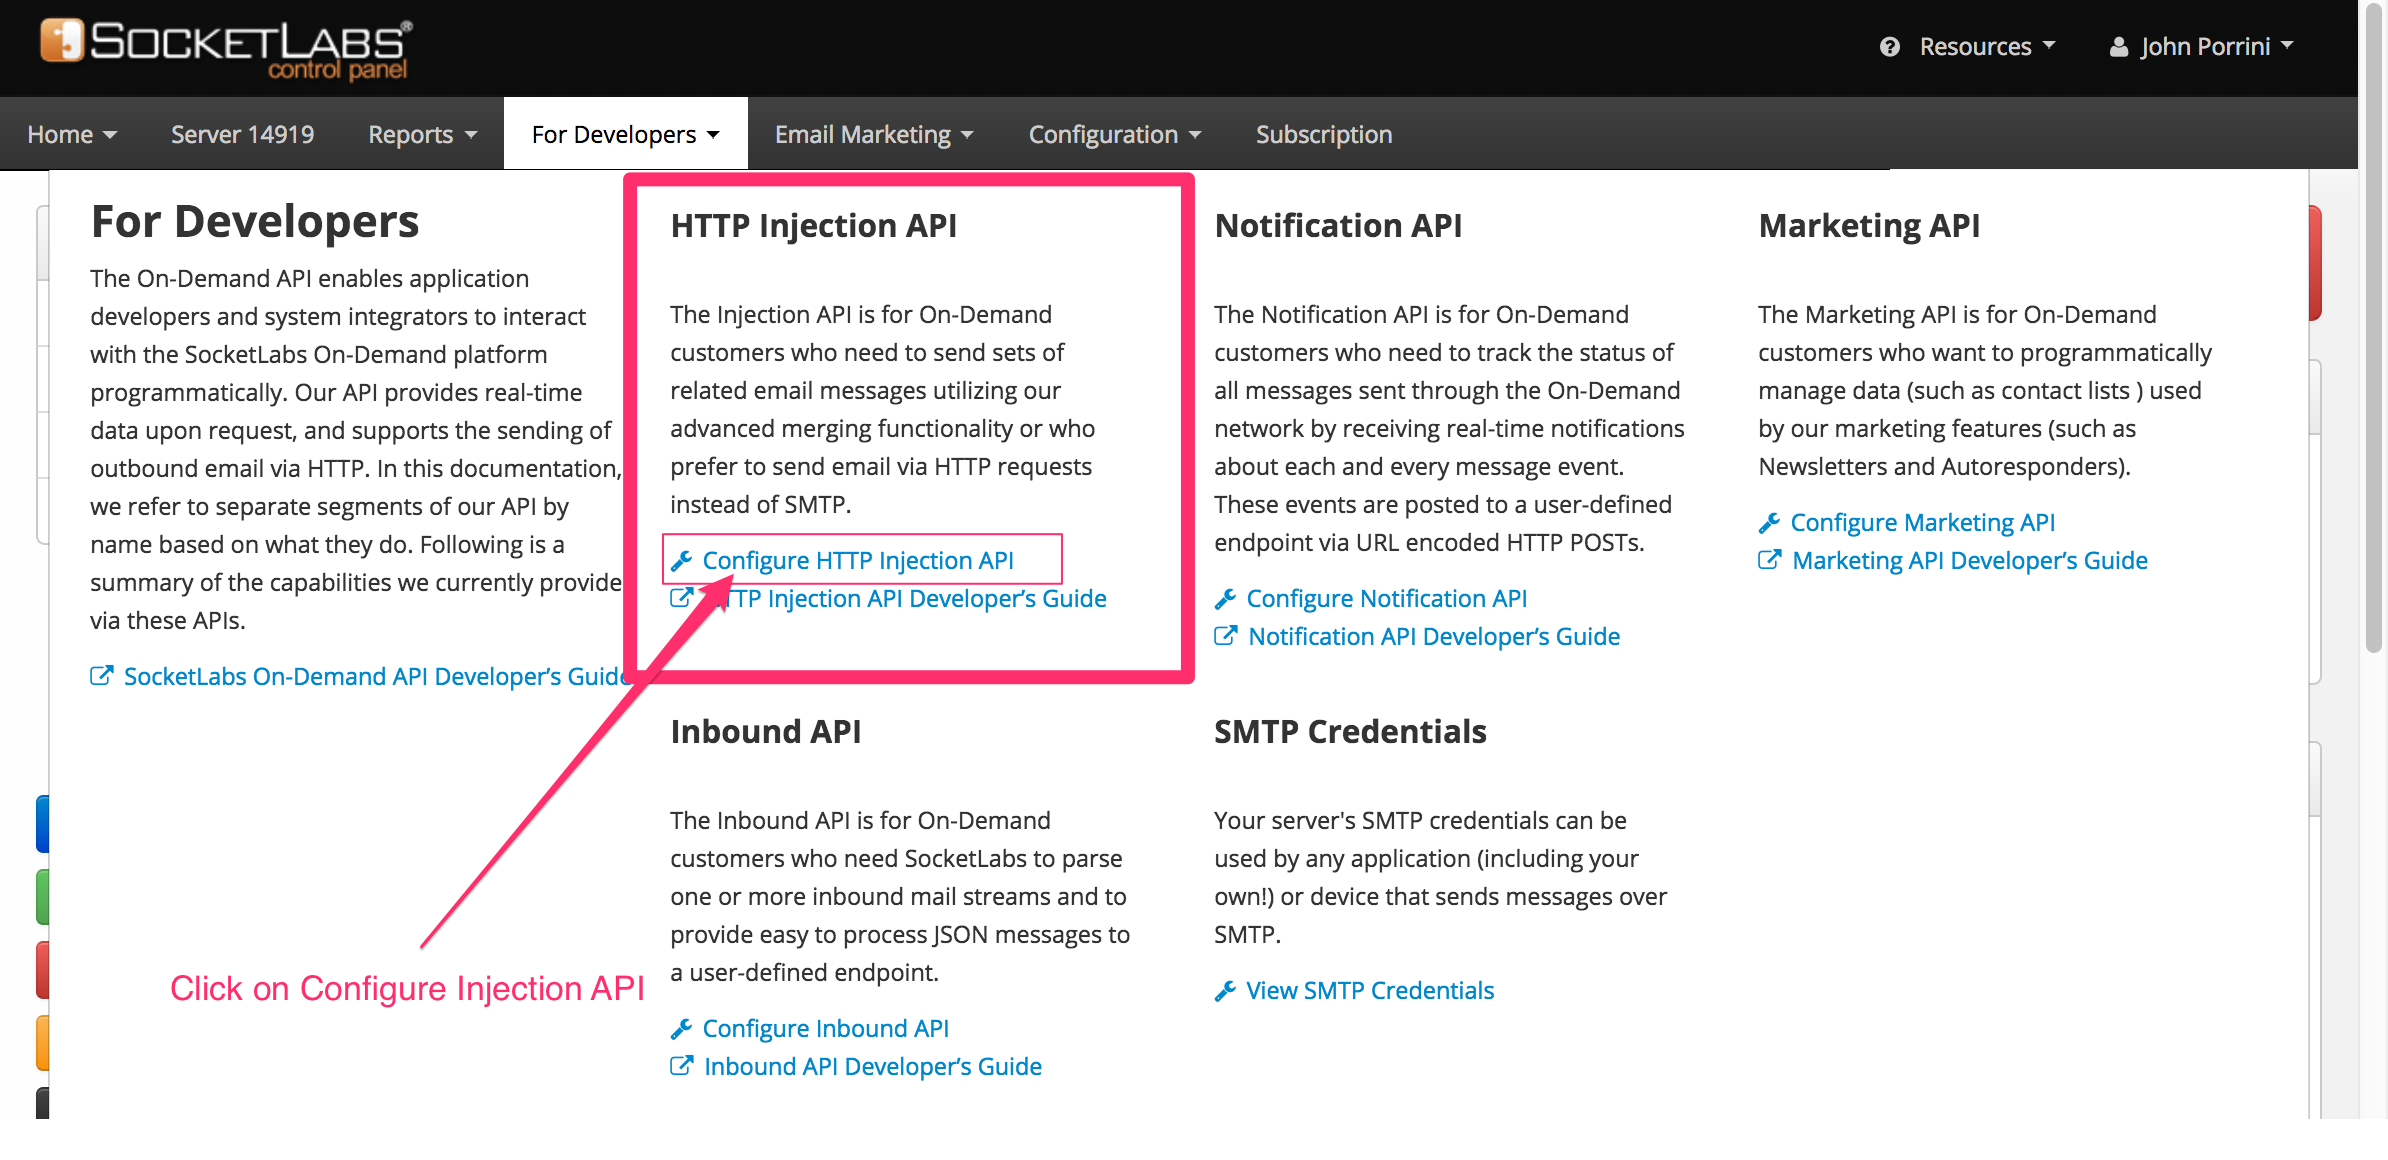
Step 5: In the For Developer sub-menu, find the HTTP Injection API section. Then click on the Configure HTTP Injection API link. This will take you to the HTTP Injection API Configuration page.
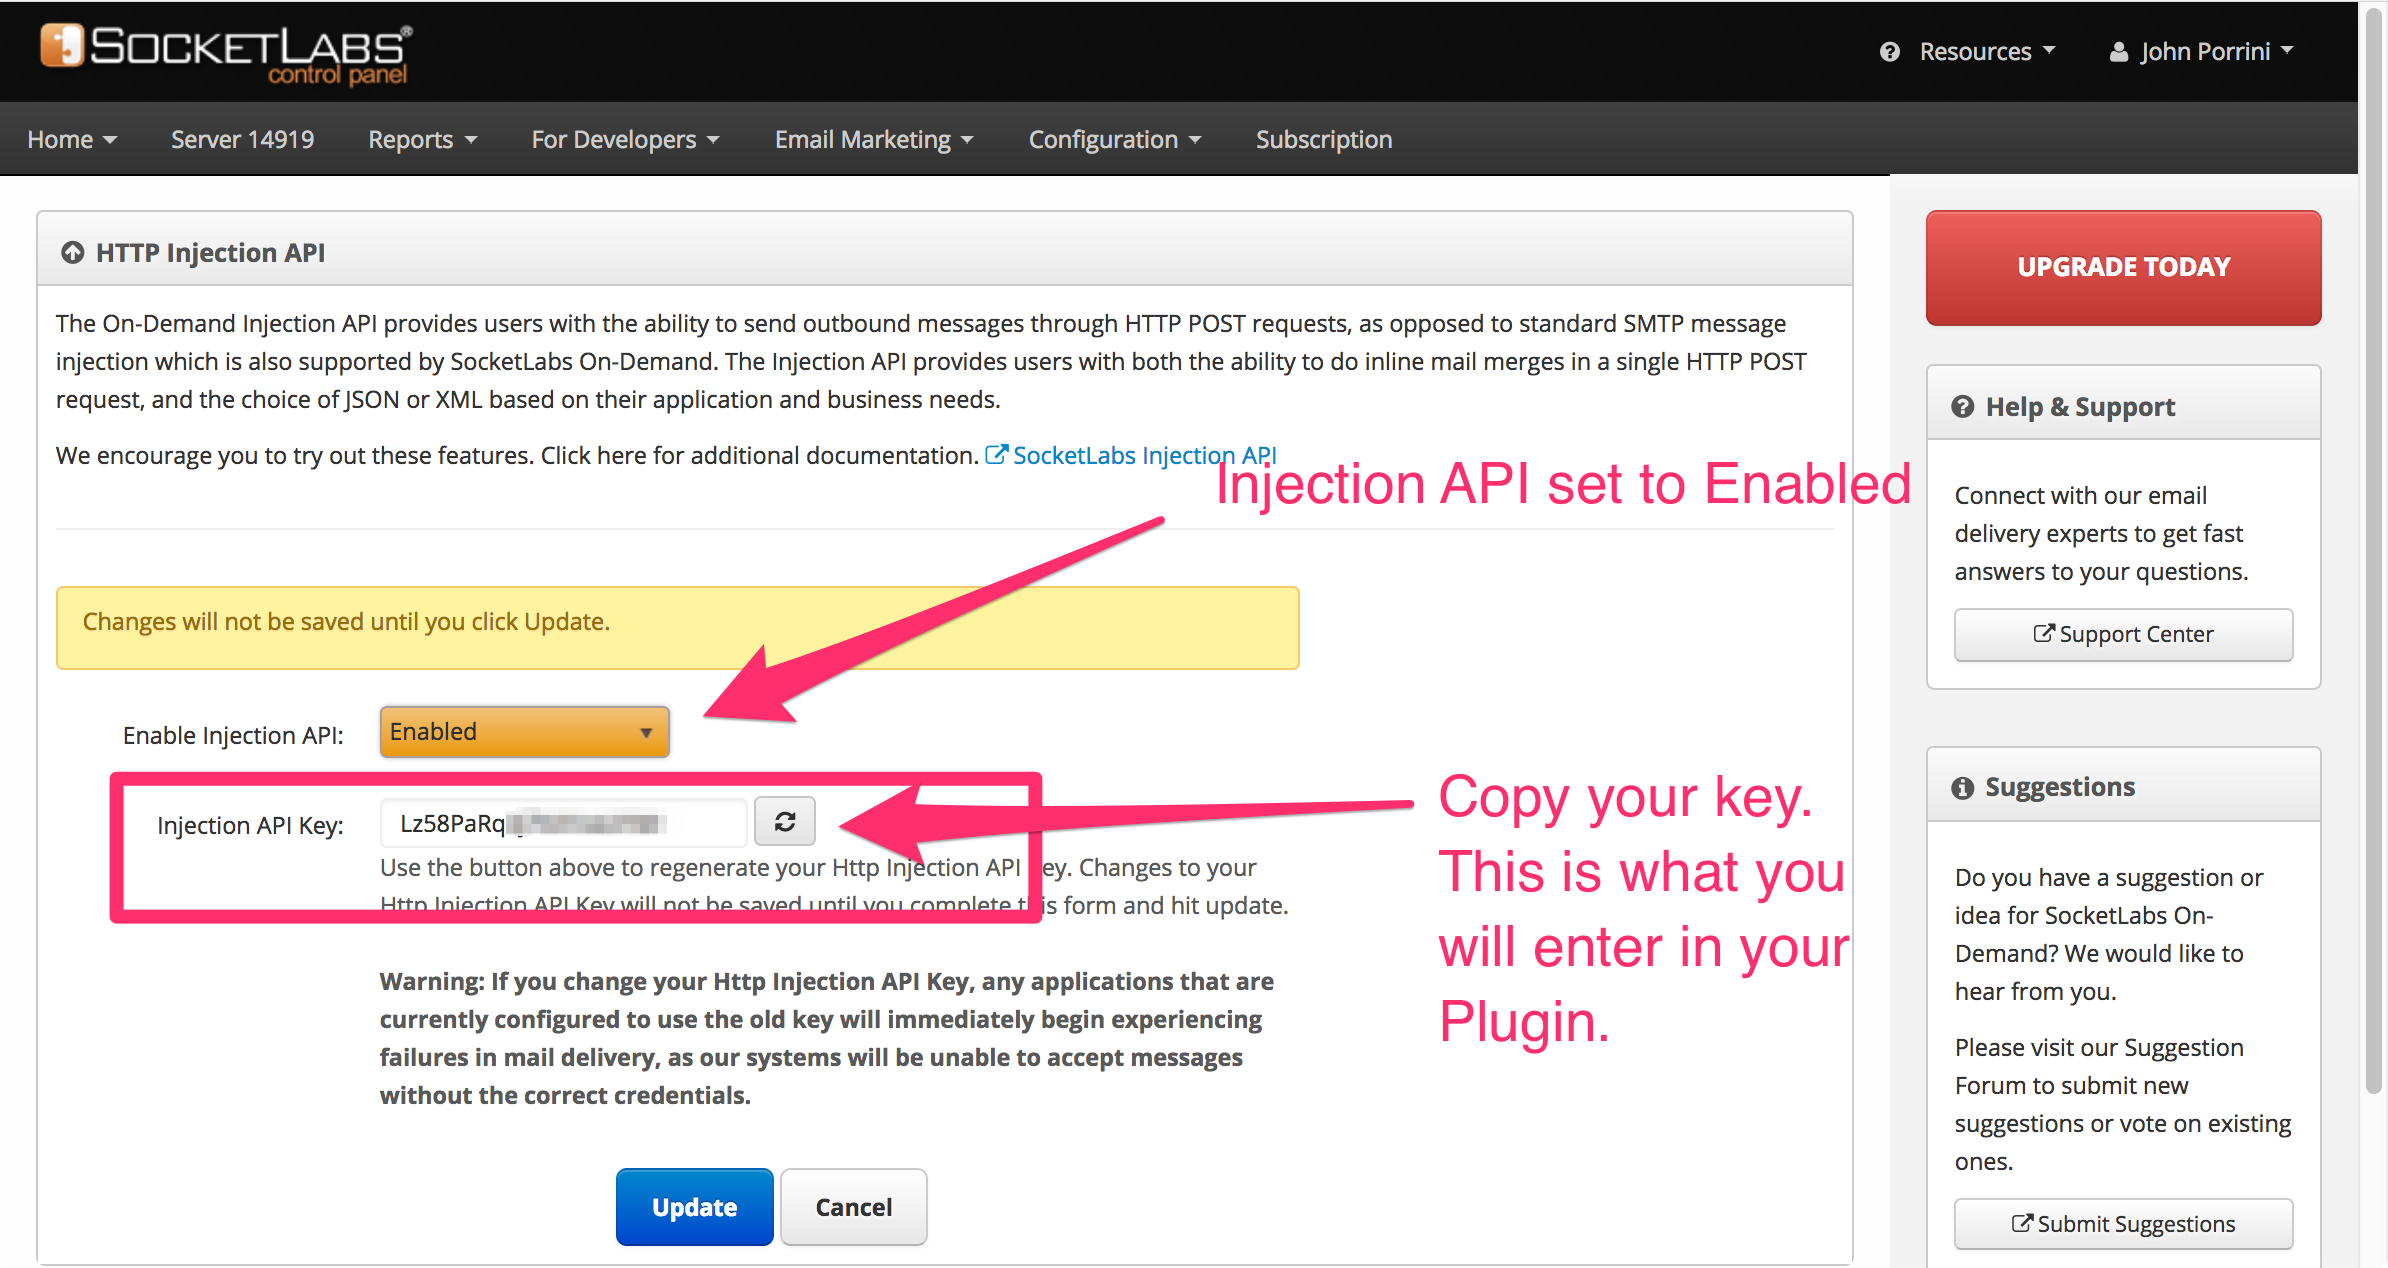
Step 6: Verify that your Injection API is set to Enabled. If the API is set to Disabled, then click on the drop-down and choose Enabled. Next, copy your Injection API Key. This is the first API key that you will enter into the Plugin.
Step 7: Now go back to WordPress and enter your Injection API Key, along with the Server ID that you found on Step 2.
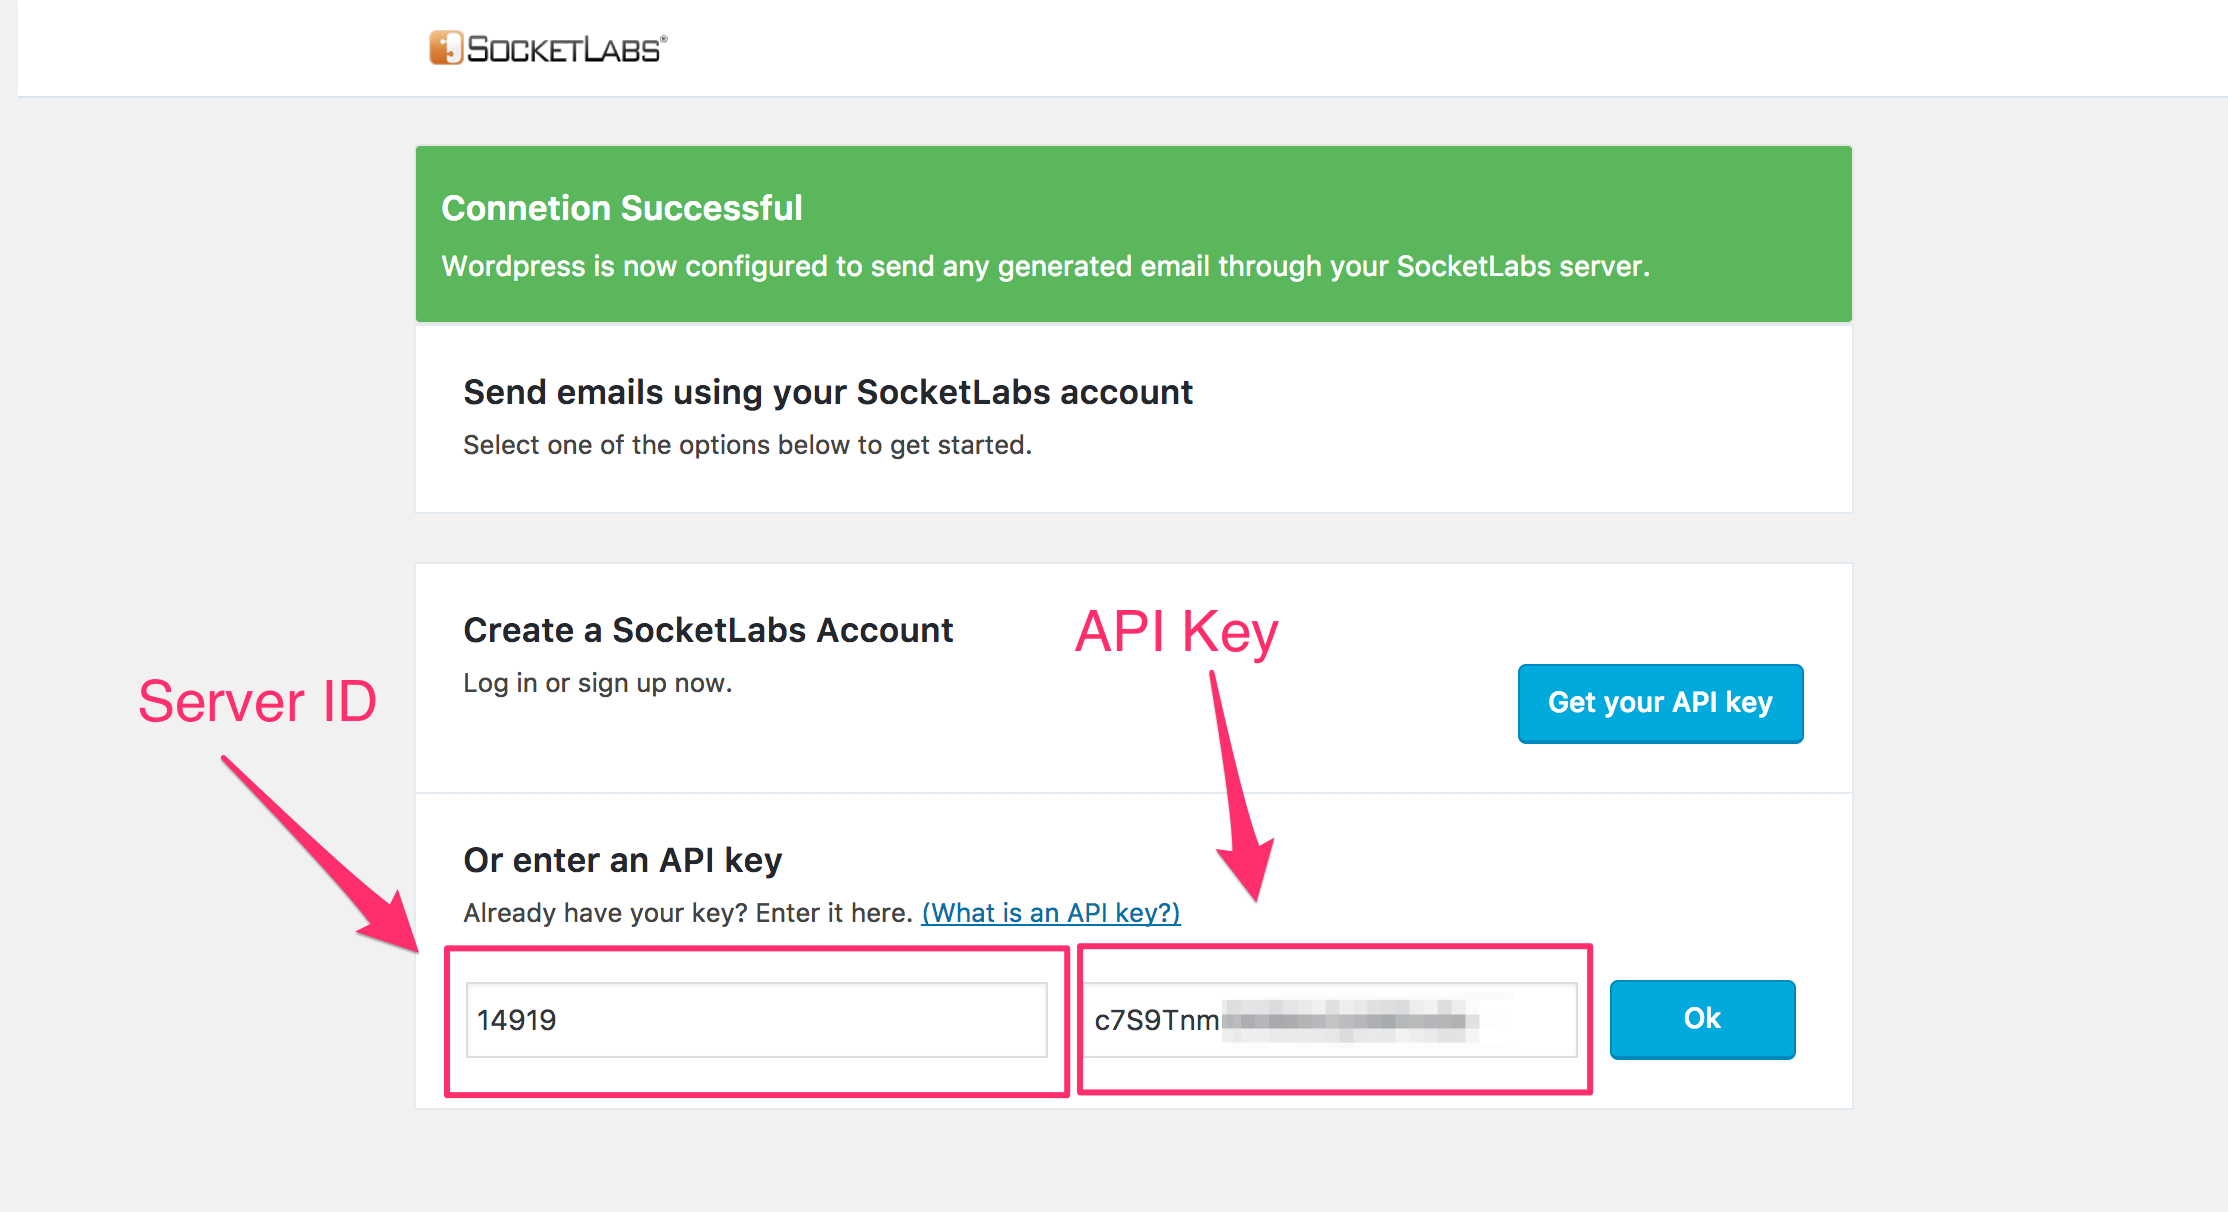
Enter your Server ID in the first field and your Injection API in the second field and click OK.
If you were successful, then you’ll receive a message like below:

This tells you that everything is working and WordPress is setup to send email through SocketLabs.
Have Questions or Need Help?
If you have questions or if you’re experiencing difficulties configuring the plugin to work with WordPress then feel free to reach out to our friendly support staff.
You can reach us by phone, live chat, or by submitting a support ticket.

